The Project Dashboard
To see the project dashboard simply click on the Dashboard icon shown below that is situated in the top left corner of your web browser:

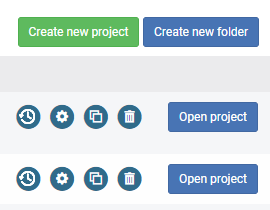
The Projects screen will list all project(s) belonging to your company account. The top part of the application screen will display Project Cards for the four (4) most recent projects that have been worked on as shown below:
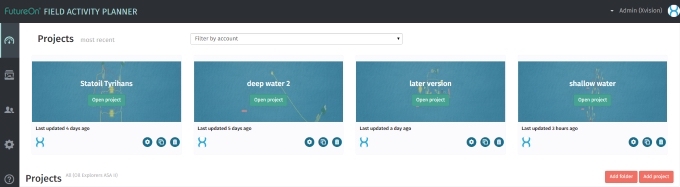
The most recent project cards will list the project name, and a thumbnail with a snapshot of the layout.
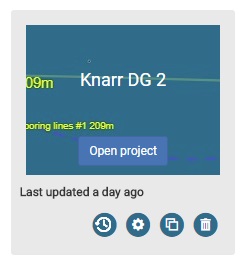
The card will also display the timestamp for the last change to the project. You will also find icons for the "Revisions", "Settings", "Clone", and "Delete" commands for the individual project in the lower right corner of the project card.
Project List
Below the most recent project section you will see a list of all other projects or project folders for your account as shown here:
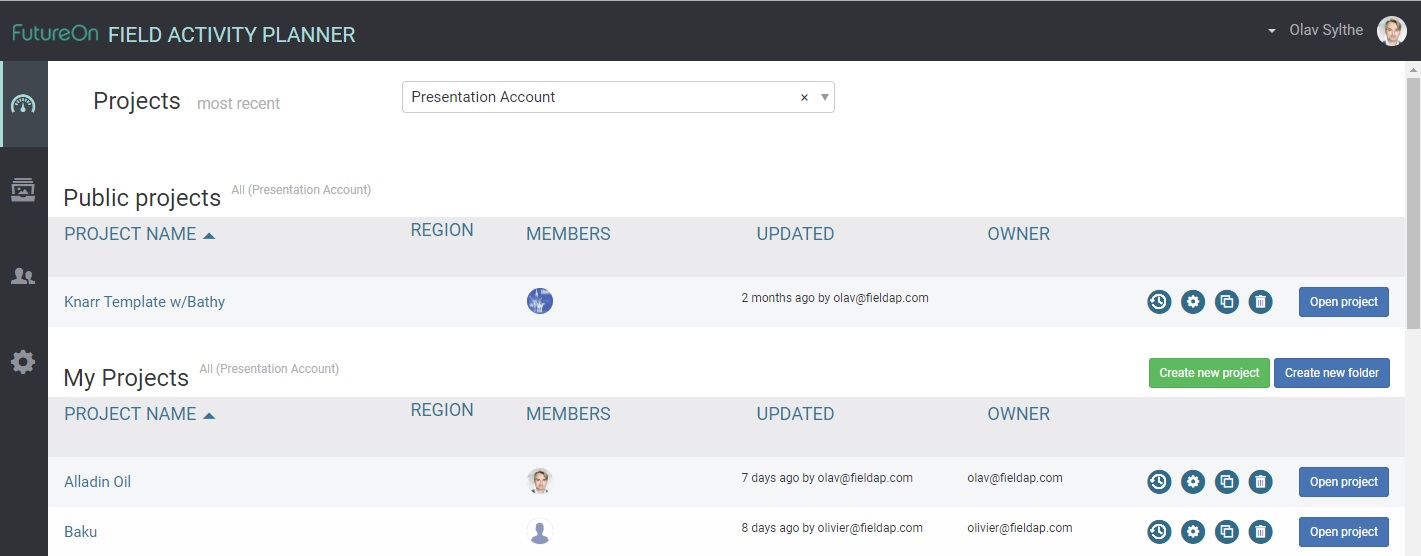
Public Projects
If users have made projects public in the Project Settings then they will be listed at the top of the Project List even without you having been invited to the project. Read more about Public Projects under the Project Settings part.
My Projects
In this section all projects that you have created or projects that you have been invited into will be listed. If you have extra Admin privileges you will also see all projects for your corporate account.
Filter by account
You can use the the account filter option at the top of the screen to quickly sort project by account membership if you have multiple accounts. Typically you will only have one corporate account. Select the account you want to see from the drop down list as shown below.

Project List Columns
The project list is comprised of the following columns; Project Name, Region, Members, Updated, and Owner.
Project Name - The name of the project.
Region - The region/area association for the project.
Members - The invited users to the project.
Updated - The timestamp for the last update to the project.
Owner - The user that created the project.
Project List Sorting
As you create multiple projects they will all be listed in the project list screen and it can require a bit of scrolling to locate the project that you are looking for. You can sort the various columns in the Project List screen in ascending/descending order by clicking on the column name for; Project Name, Region, Members, Updated, and Owner.
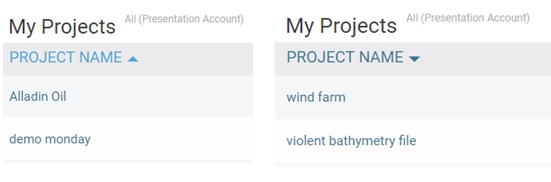
If you would like to sort the project list by Project Name simply click on it and the projects will be sorted alphabetically in ascending order as indicated by the “up” arrow symbol as shown below. To sort in descending order, click again to reverse the order and it will be indicated by the “down” arrow symbol.
Open Project
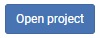
To open a project simply click on the project name or on the "Open Project" button as shown below.
This will then load the selected project and display it on the screen where you can either view or edit it.
Create Folders
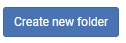
Select the Create new folder button from the top right area of the Projects screen to create a new project folder. This will make it easier to organize your various individual projects into different folders. At the moment the folder structure is limited to one (1) level only.
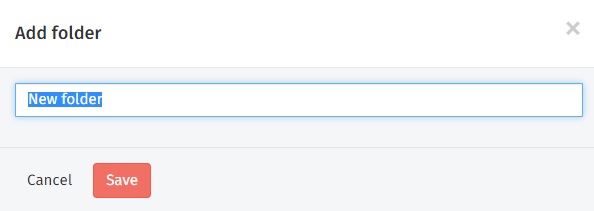
This will display a dialog prompting you for the name of the new folder that you wish to create. Simply enter the new folder name in the text field. Then click "Save" to create it, or press "Cancel" to exit without making any changes.
Move Projects between folders
Moving projects into or between folders that you have created are done by simply moving the mouse pointer over the project name line you wish to move. The mouse icon will then change into the hand symbol. Then simply click the left mouse button and hold it down while dragging it onto the folder name where you want your project to reside.
The folders will have a folder icon with the folder name next to it and the project count for the numbers of projects in the folder displayed as shown here. Press on the right arrow icon to expand the folder to show the content.

To move a project out of the folder simply drag it outside the same way you moved it into the folder as described above.
Delete Folder
To delete a folder simply click on the trashcan icon to the right, and you will be prompted if you want to delete the folder. Press Ok to delete it. Note! The delete operation only deletes the folder and NOT the project(s) inside. The project(s) inside will simply be returned to the project list.
Clone Project
Select the "Clone Project" icon as shown below to make a new copy of an existing project:

The "Clone Project" button is useful if you are viewing a project from another user and that is "View only". By making a copy you are then allowed to edit it. This is useful if you would like to quickly and easily create variations of the same field layout or compare different field activity plans. This will create an identical project named "project name (clone)". You can change the name using the project settings.
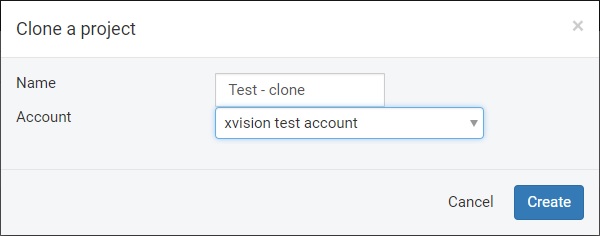
If you are an admin and have access to multiple accounts, you can also select which Account you wish to clone the project into, by selecting the desired Account from the drop down list.
Delete Project
Select the "Delete Project" icon as shown below to permanently delete an existing project:

Pressing the "Delete Project" for a project will prompt you first if you really want to delete the project in question with the following dialog:
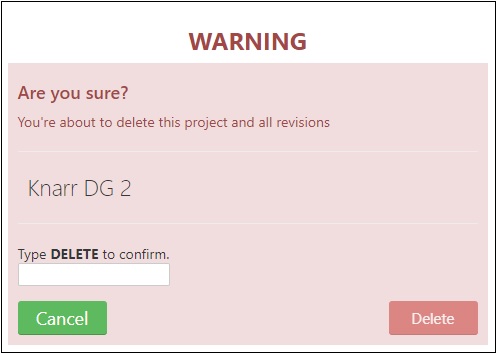
Type DELETE in capital letters to confirm, and press the Delete button and the project and all the project revisions will be permanently deleted. To abort, simply press "Cancel".
Add Revision
The "Clone" function is useful in order to quickly make a copy of the entire project or individual sub project. However, we recognize that in order to maintain a seamless digital visual workflow it is helpful to have the ability to create and track official individual revisions of a project.
Therefore, users now have the ability to track revisions of a project within the workspace e.g. tracking decision gates, milestones etc. Available any time, there are two ways to access a project’s revision history. See screenshots below:
1) Before opening a project, click on the revision history icon next to the project’s name in the project list,
using the "Revision History" icon

or
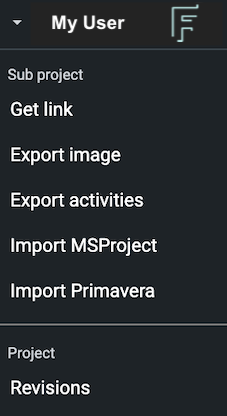
2) If already inside a project, select the "Revisions" menu option within the account menu.
These options will open the revision history screen as shown in the illustration below. Here you can find a detailed list of the selected project cataloging a timestamp of when the revision was made, by whom, and revision’s number. The update also makes it possible to use your own revision numbering e.g. if you employ an EDM system that creates these numbers automatically. The default revision number is automatically created by FieldAP.
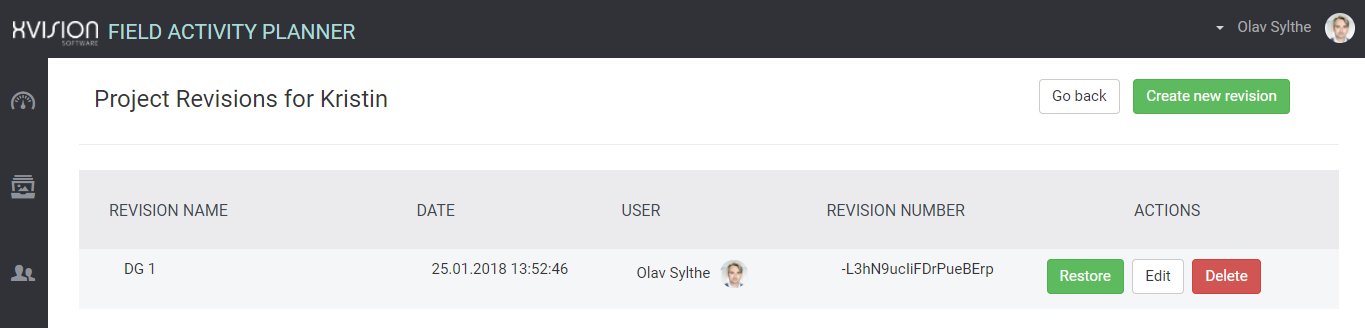
On the revision history screen, you can perform the following commands; "Create new revision", "Restore" to restore an earlier revision, "Edit" to change information about an existing revision, or "Delete" to remove a revision.
Note! When restoring a selected revision, it will be restored as a new project that will appear in the project list outside this screen.
Create New Project
Select the Create new project button from the top right area of the Projects screen to create a new project.
Project Settings
This will display the Project Settings screen for creating a new project.
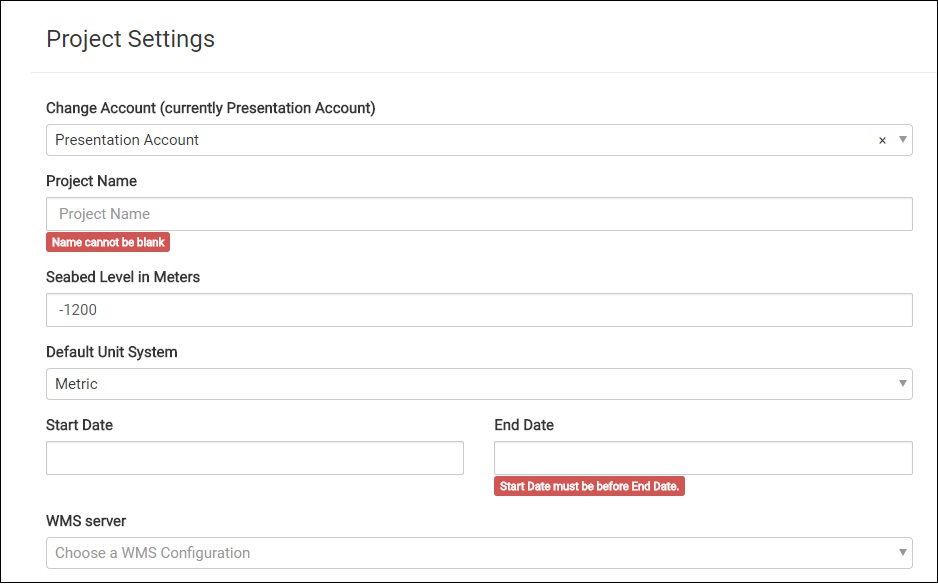
The first part of the settings screen allows you to create the project name, define the Sea bed level or depth in meters. You can also set the Default Unit System to either "Metric", "Field", or "SI" units.
You will also need to specify Start and End dates for the project. The Start- and End-date fields will present you with a Month-calendar picker for quick and easy date selection. Note! All projects requires a date range even if you do not plan to add any activities for the project.
The WMS server selection allows you to select a mapping service configuration for the project if this has been defined by your system adminstrator for your account under Account Settings.
Optional project settings
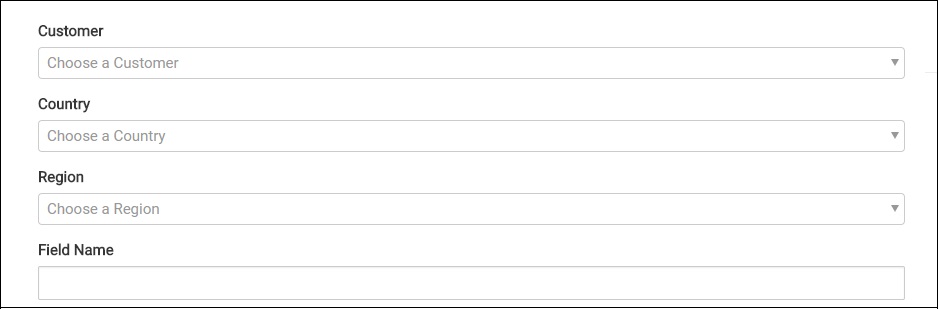
These settings are optional, and are typically used by our EPC customers for additional information about the project. If your system administrator has defined a list of Customers and/or Regions under the Input Configuration tab under Account Settings they will be available for you to select here. Country will display a list of countries for you to select from. Field Name is an optional field for you to specify the field name in question.
To modify the Project Connection settings, Currency settings, Asset Cost settings, or Connection Cost Settings click on the corresponding expandable section as shown here

Connection Settings
You can only modify the default connection types under the Account Settings. However, on a per project basis you can add new custom connection types if you wish. Simply click on the small arrow icon to the left of the Connection settings field to expand it.
Then click on the "Add Custom Project Connections" button.
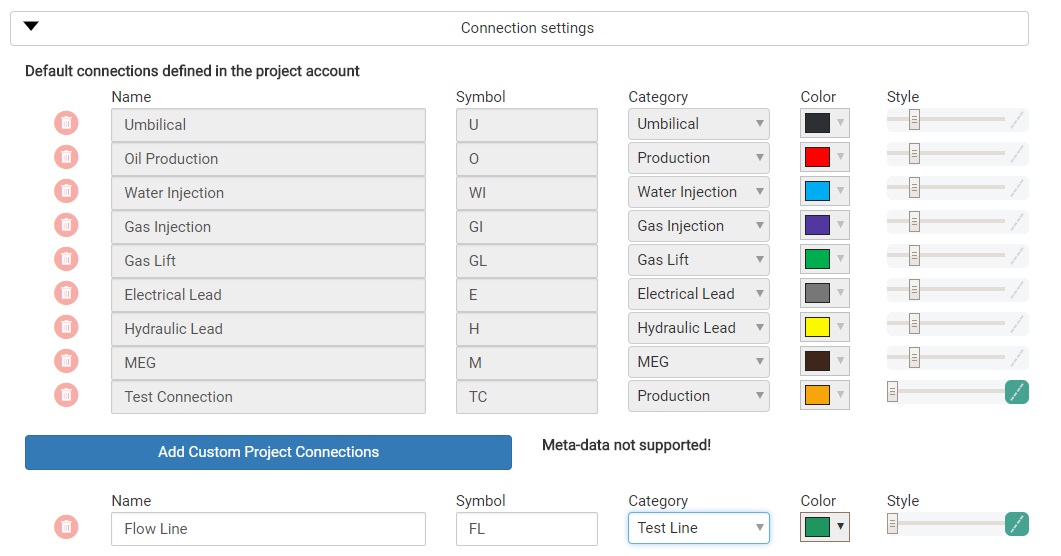
Here you can set the custom connection Name, Symbol, Category, Color, and Style.
Name - This is the name for your custom connection for this project.
Symbol - This is the Symbol name or your custom connection for this project.
Category - Assign a category for your connection for this project.
Color - Use the color picket to assign a custom color for your connection for this project.
Style - Use the slider control to give the connection line thickness, and if you want the connection to be drawn using a dashed line, click on the Dashed icon.
You can delete a custom connection from the project by clicking on the trashcan icon on the left side.
Note! - Meta data for custom connections are not supported!
Currency settings
As some projects can involve costs in various currencies based on different vendors, geographic project locations etc. the cost module now allows you to define entering costs for equipment and/or operations in different currencies.
To do this you define which currencies you will need and their project defined exchange rate in the Project Settings as shown below.
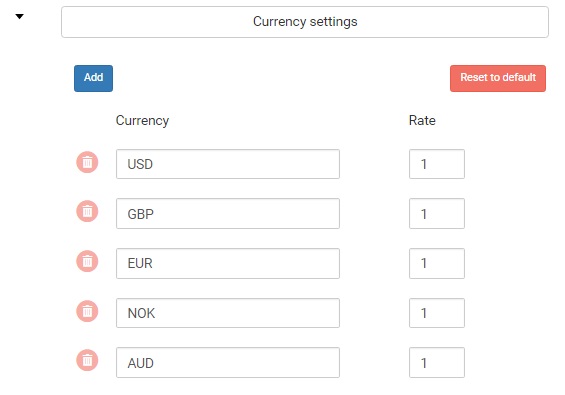
By default the most commonly used currencies are defined by the system, but you can quickly add new project specific currencies by simply clicking the "Add" button. This will create a new line at the bottom of the currency list, where you enter the currency name and exchange rate. You can also delete currencies you do not need, by clicking on the "Trash" icon to the left.
The "Rate" field is where you enter the currency exchange rate that you wish to use for the project for a specific currency. Note that the selected "Project currency" will have the rate set to a value of "1" as this will be the summation currency used for the project.
Note! If the account settings have define default currencies and exchange rates then these fields will be populated by the account setting default values.
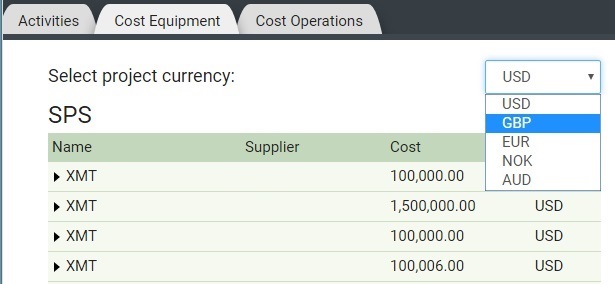
Selecting a Project Currency
The "Project Currency" drop down list allows you to select the specific currency you want to use for the project cost summation or Total Cost for both Equipment or Operations. By default the topmost entry in the list under "Currency" under "Project Settings" will be the default unless you change it in one of the "Cost" tabs. Note! The Rate will be set to 1 for this currency. See the illustration below for an example.
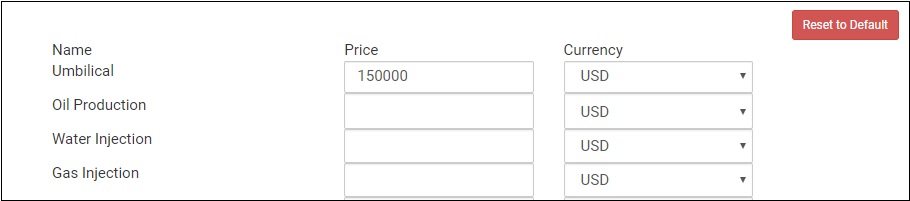
Asset cost settings
This section allow you to assign a project based default cost for all the assets in the generic Asset Library.
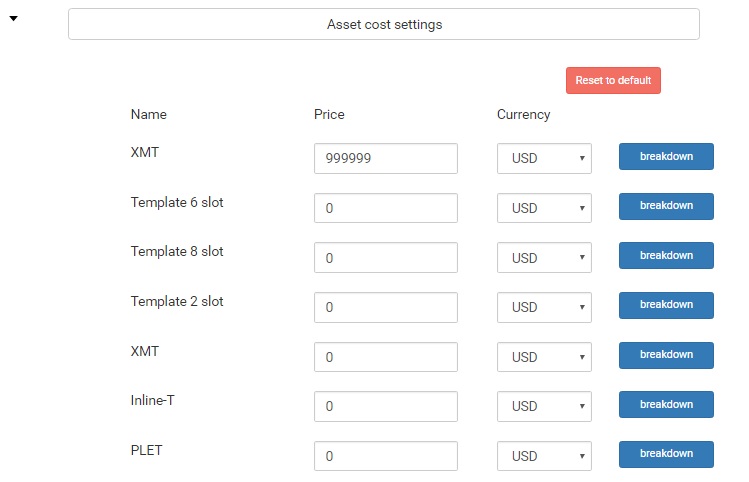
Note! If the account settings have defined default asset costs then these fields will be populated by the account setting default values.
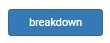
To assign a default cost on an asset for your project, simply modify the Price field next to the asset, and assign the appropriate "Currency" in the drop down list to the right of the "Price" field. You also have the possibility to break down asset cost into itemized parts and assigning individual cost for each sub part. To do this simply click on the "breakdown" button.
This will display the dialog for assigning " Cost" for individual parts as shown below:
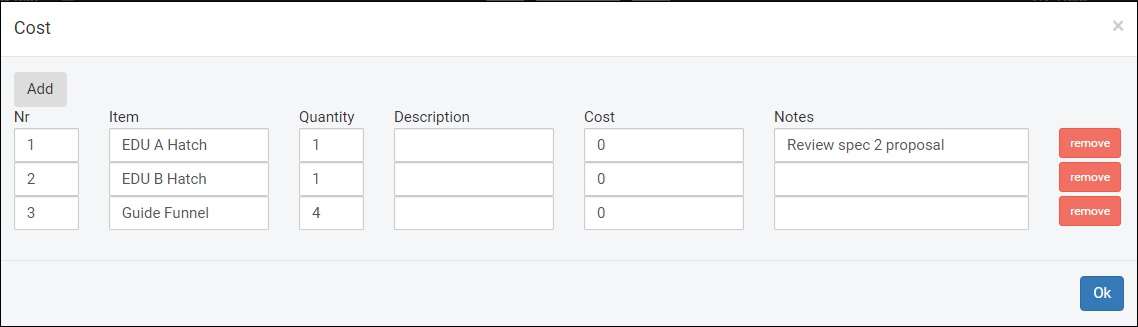
To assign cost for an individual part, simply click on the "Add" button to add a new line for each part that you wish to assign the cost for. You can add information in each of the following separate fields; Nr, Item, Quantity, Description, Cost, and finally Notes.
To delete an item from the list, simply click on the Remove button to the right of the "Notes" field. When you are done, click on "Ok" to accept the entries made. To exit, click on the "X" icon on the top most right corner of the dialog.
Connection Cost Settings
This section allow you to assign a project based default cost for all the defined Connections in the project.
Click Save project to create it and return to the project list, or click on Save and Open Project to open the new project directly. Pressing Cancel will exit without making any changes.
Editing Project Settings
If you want to edit project settings you can access the project setting screen by pressing the cog wheel icon in the project list as shown here
or when the project is already open and on screen by pressing the cog wheel next to the project name in the upper left corner as shown here:

The project setting screen then will be displayed with addition information.
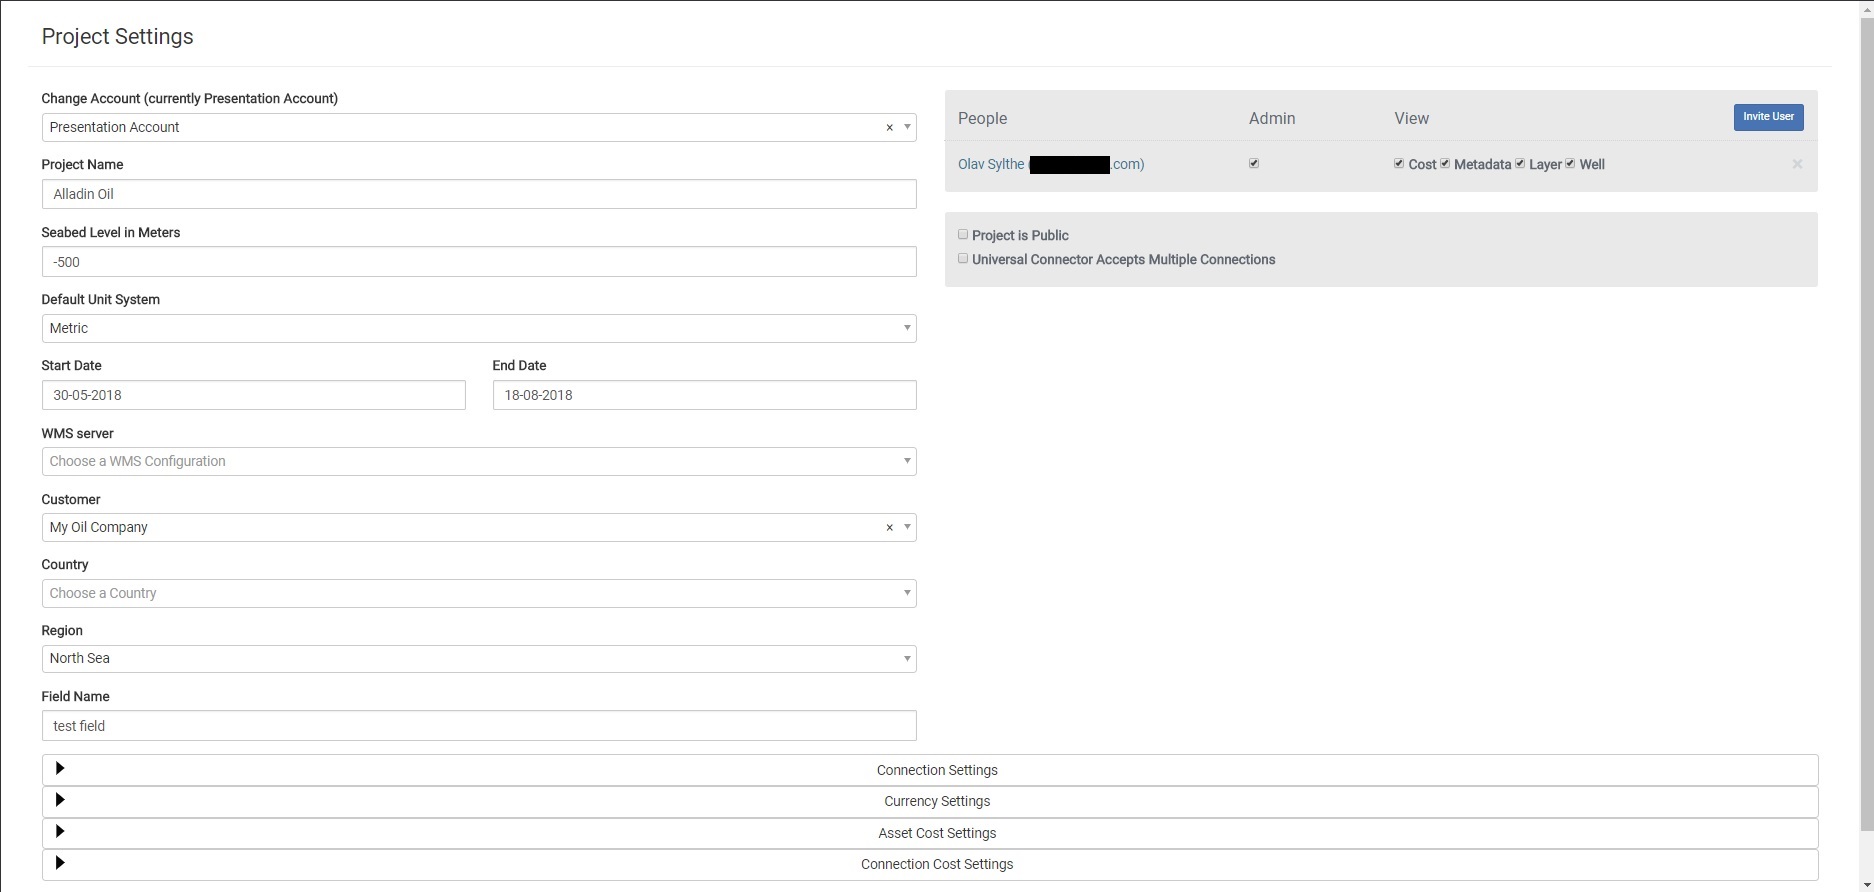
Inviting new project members
This section allows you to invite other registered FieldAP users as new project members to your project.

Click on the "Invite User" button in the "People" field as shown above will display the following dialog:
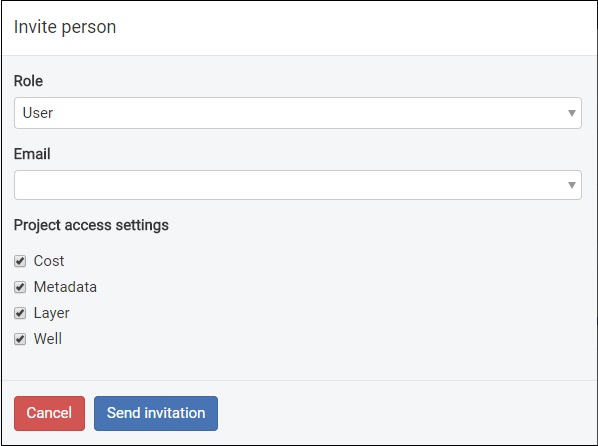
Select the Role for the new user as either User or Admin. The the Email drop down list will present the registered FieldAP users that you can invite to your project. Select the person you want to invite. You will also need to assign the Project access settings e.g. should the user be allowed to view/change modules for the following; Cost, Metadata, Layer, and Well.
Press "Send invitation" to issue the invitation. Otherwise select "Cancel" to return without inviting anyone.
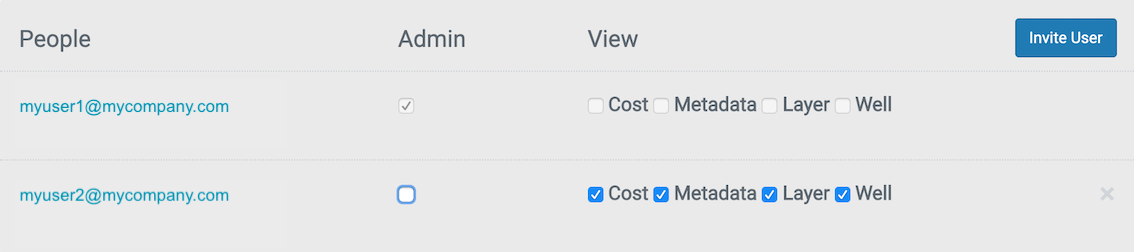
To change the role of a user in the project just check/uncheck the admin check box behind the user name.
To delete a user from the project simply select the delete "x" icon behind the invited user email.
Public Projects
Public projects are useful if you want to use your project as a project template or reference project for others that they can clone to get started quickly. Eg. you might create a project that might be comprised of Bathymetry, Wells, Reservoir Data etc. that will be used by everyone that will work on field layouts. To make your project public for all users in your account simply check the following in the Project Settings screen:

Defined Connector disallows Multiple Connections
This option if checked disallows defined Connectors e.g. Oil Production, Water Injection etc. to have multiple connections on it. If it is not checked you can attach multiple oil production on the same Connector. Note! The universal connector always allows this behaviour.